Outdated but kept for compatibility.
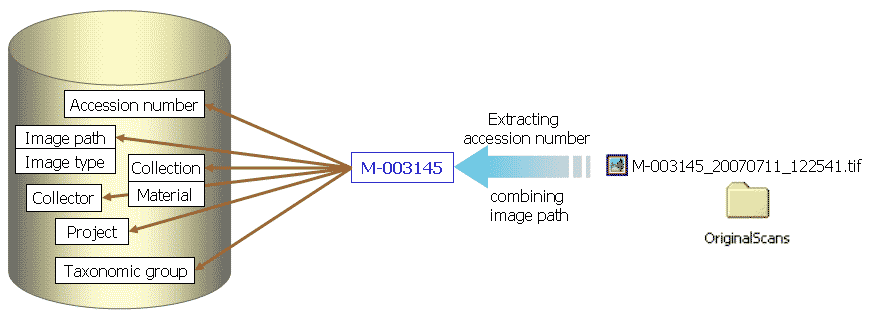
With this import routine you can import new data sets along with new images into the database. To achieve this the image files should be named corresponding to the accession numbers of the data sets which should be imported (e.g. M-003145 in the example below) and an optional trailing identifier (e.g. _20070711_122541 in the example below. The image below shows an overview of the entire import process.

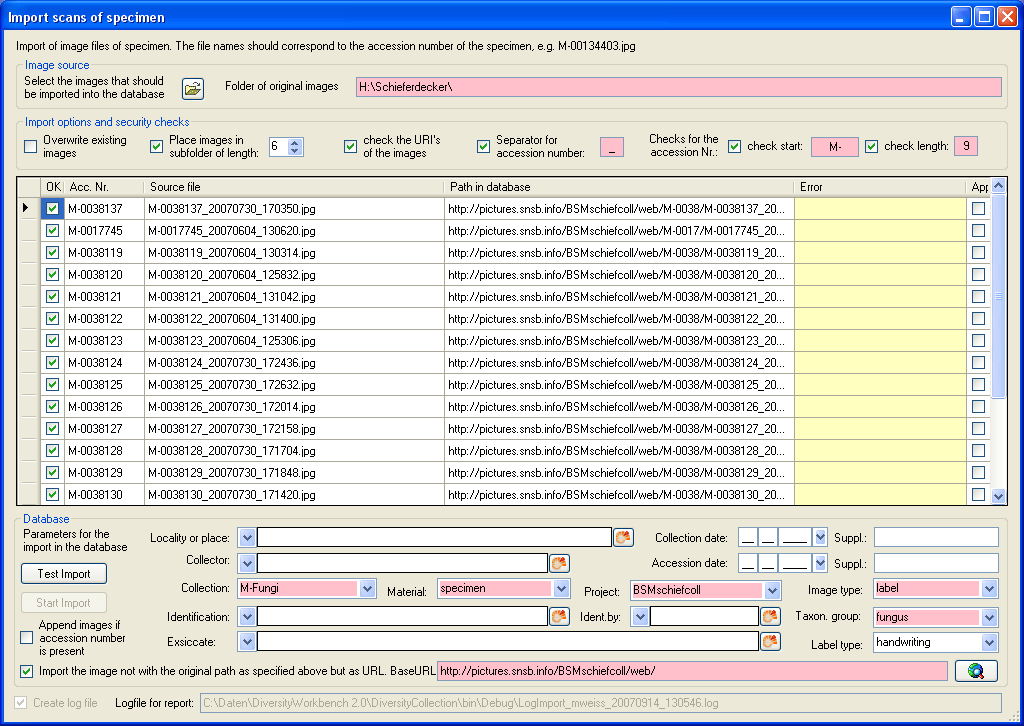
To import images like scanned labels from specimens choose Data - Import - Specimen scans... from the menu. A window for the import of images will be opened (see below).

The fields marked with red are mandatory.
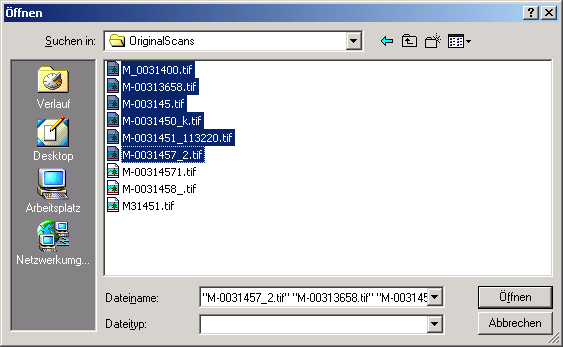
To select the images
you wish to import in the database click on
the  button. A
dialog will open where you can
select the images you wish to import into
your database.

Select the files and close the window to enter the selection of the images in the list in the form.
If you wish to replace data sets for images already in the database, check the Overwrite existing images checkbox. If the images are located in a subfolder which is named according to the first characters of the accession number, check the Place images in subfolder of length checkbox and specify the length of the name of the folder. If you wish to check the URIs of the images, check the corresponding checkbox. The data sets will then only be imported if the images are available on the web. If the filename next to the accession number contains a trailing identifier, it must be separated by a unique character. Check the corresponding box and enter the separating character. If you wish to assess whether the accession numbers are correct, you can check the start and the length of the accession number by checking the appropriate checkboxes.
The list shows the image files selected for the import. To test if all files passes the specified checks, click on the Test import button. If the file name passed all checks, the OK field for the image will be checked after the test. Otherwise an explanation for not passing the checks will be shown in the Error column.
The first column of the list shows the accession number extracted from the file name. The second column shows the file name of the original image file and the path written in the database. These paths may differ from the original, if you select the option for setting a different BaseURL. If a data set for an image already exists in the database and you selected the Append images option, the checkbox Append at the right end of the table will be checked.
You can set several mandatory and optional values to be written in the database for all imported data. The fields marked with red are mandatory. These are the collections in which the specimens are located: the material categories of the specimens, the project, the content type of the scans (e.g. label) and the taxonomic group of the main organism in the specimens. If you wish to refer to a web source for the labels instead of a local file, you need to provide the base URL as well. Optional fields are a place according to the DiversityGazetteer and the date of the gathering event, the collector, the accession date, an identification, an exsiccatal series and the type of the label. For explanation of the buttons see module related entries .
To test the import
and whether the images are
present in the database click
on the  button.
If everything is fine click on the
 button
to start the import.
Logfile: To log the list of imported images and any errors during the import check the Create log file checkbox. This will create a log file with your name, the date and time of the import in the directory where the image files are located.
The program will check whether an accession number is already present in the database. It will only import the data, if the option Append images if accession number is present is checked. Otherwise this data will not be imported.
If the images will be provided by a
webserver, check the
appropriate checkbox and specify the folder
or click on the  button to search for the website.
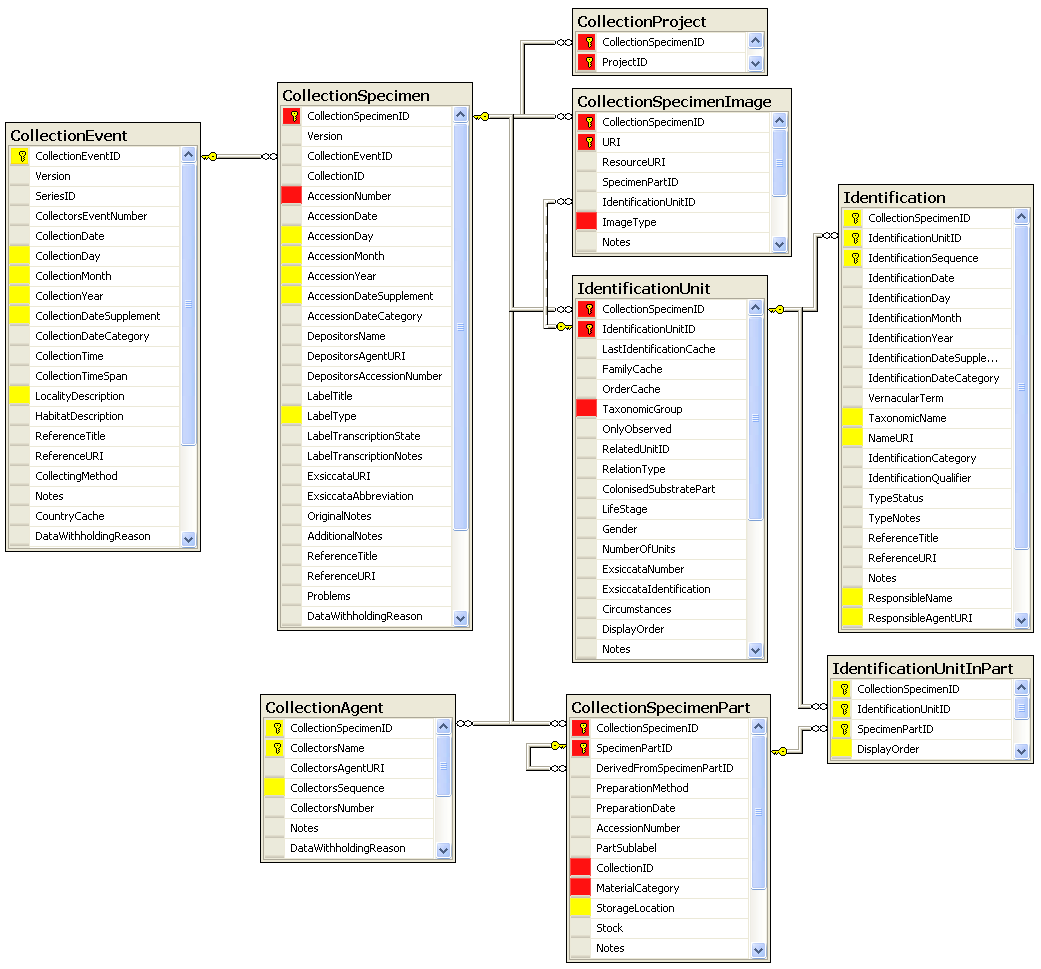
In the overview below the mandatory fields are marked with red, the optional fields with yellow.
