 .
If no map is displayed (e.g. because there is no internet connection), the user may press
.
If no map is displayed (e.g. because there is no internet connection), the user may press
 and load a local map instead, or
 to cancel the loading of the shapes.
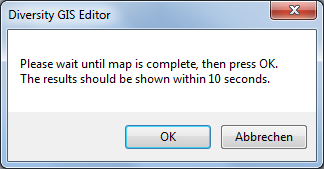
A background map is required before objects (areas, line strings, points) can be
loaded. If no background map is available, the GIS Editor will extract the appropriate
area from the sample file data and automatically adjust the map viewer to cover
the region. The user is prompted to wait until the map has been established completely and then press
.
If no map is displayed (e.g. because there is no internet connection), the user may press
and load a local map instead, or
to cancel the loading of the shapes.
When loading a shape file, the objects will be displayed at the background map according to their coordinates and added to the Sample List automatically. The GIS Editor is able to read MS-SQL Geo Object files (.shp1), TAB separated text files (.shp2), GPS Exchange Format files (.gpx) as well as ArcView Shape Files (.shp).
The assumption of the type of input file is made according to the extension of the file, so e. g. a TAB separated input file of an external source might have to be renamed to .shp2 before it is loaded by the GIS Editor. The input parameters of the first text line are determined, a dialog window will open and show them on the left.

Then you have to assign certain input values to the GIS Editor attributes, wich are displayed in the middle of the window. Select an input parameter using the radio button on the left, then assign it to one or more sample attributes by clicking the appropriate checkbox in the middle. The assigned values are shown on the right side of the window. Values in gray are default parameters, which are used if the attribute has not been assigned. There is just one mandatory attribute which has to be set, the Geography Data (SQL Geo Object). If there is no SQL Geo Object available in the input file, a point object will be created automatically when assigning longitude and latitude parameters.

To assign up to 10 input parameters simultaneously to the adjacent 10 sample attributes,
just click on the
 button. This is helpful if the input file has been created with the GIS Editor itself, so the
input values are already in the right order.
button. This is helpful if the input file has been created with the GIS Editor itself, so the
input values are already in the right order.
To remove all assigned values, click on the
 button.
If the assignment is done, click on the
 button to show all geographic objects of the input file according to the assigned parameters.
Each object will be added to the list as a separate sample. To put all objects together as one
single sample, check the "Save as one object" box.
button to show all geographic objects of the input file according to the assigned parameters.
Each object will be added to the list as a separate sample. To put all objects together as one
single sample, check the "Save as one object" box.
Click on the
 button to cancel the load operation.
The last assignment is saved by the GIS Editor and can be used for the next input file, if it
has the same structure as the previous one. Just click on the
 button to assign the same input parameters as before.
The GIS Editor supports ArcView Shape Files (.shp) using geographical, UTM or Gauß-Krüger coordinates. The type of the coordinates (Geographic/Gauß-Krüger or UTM) has to be selected first in the GIS-Editor Settings, in case of UTM also the zone and the hemisphere. If an ArcView attribute file (.dbf) is available, a window will open and show the attributes of the first shape. The user may select the attributes which should be used to create the sample ID and description. Check one or more appropriate boxes and assign them by clicking the "ID" or "Text" button. A separator string may be defined to combine the selected attributes to the final text string. If no attribute is selected, the name of the ArcView file is assigned to the sample description.

To access the dBase attributes file for reading or writing, the Microsoft ACE OLEDB 12.0 driver must be installed on the computer. If it is missing, the attributes cannot be evaluated and a warning will be displayed. The shapes will be loaded properly, anyway, but no description will be added.

When loading an image without world coordinates, it will be displayed top left in
the working area. If no background map is loaded yet, the Screen symbol
![]() is shown in the status line, followed by the screen coordinates of the current cursor
position.
is shown in the status line, followed by the screen coordinates of the current cursor
position.
When loading an image with world coordinates and no background reference map exists,
it will be displayed top left in the working area. The World symbol
![]() is shown in the status line, followed by the screen coordinates and the world coordinates
of the current cursor position.
is shown in the status line, followed by the screen coordinates and the world coordinates
of the current cursor position.
When loading an image with world coordinates having an existing reference map, it will be embedded in the background map according to its coordinates. If the new image does not overlap with the reference map, the image exists virtually in the coordinate system, but possibly could not be seen because it is too far away from the reference map.
Loaded images with world coordinates are immediately added to the Sample List.
When loading an image without world coordinates it is displayed, but not yet added to
the Sample List. The user has to add it manually by pressing the Add button
. This is because the user should have the opportunity
to adapt the image to the background map to be stored later on with applicable coordinates.