 .
.The data transferred into the cache database are
always transferred according to a project they belong to. If no projects were
added so far the window will appear like shown below. For an introduction see a
short tutorial
.

To add a new project
for the transfer into the cache database, click on the Add project
 button. In the area below a new entry as
shown below will appear. The area on the right shows the number of datasets in
the project in the source database together with the date of the last update.
To ensure the separation of the data between the projects, DiversityCollection
creates a separate schema for every project named Project_[name of the project]
together with needed roles, tables etc..
button. In the area below a new entry as
shown below will appear. The area on the right shows the number of datasets in
the project in the source database together with the date of the last update.
To ensure the separation of the data between the projects, DiversityCollection
creates a separate schema for every project named Project_[name of the project]
together with needed roles, tables etc..

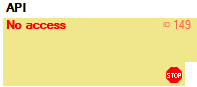
In case there are projects where you do not have access to, this will be indicated as shown below.
In case a project has been renamed
in the main database, a
 button will appear as
shown below. The displayed name corresponds to the name in the
main database. To see the original name, click on the
button.
button will appear as
shown below. The displayed name corresponds to the name in the
main database. To see the original name, click on the
button.

Before transferring data you have to update the
project schema to the latest version, indicated by the appearance of an
update button
 . Click on the button to open a window as
shown below. Click on the Start update
. Click on the button to open a window as
shown below. Click on the Start update
 button to update the schema to the latest
version.
button to update the schema to the latest
version.
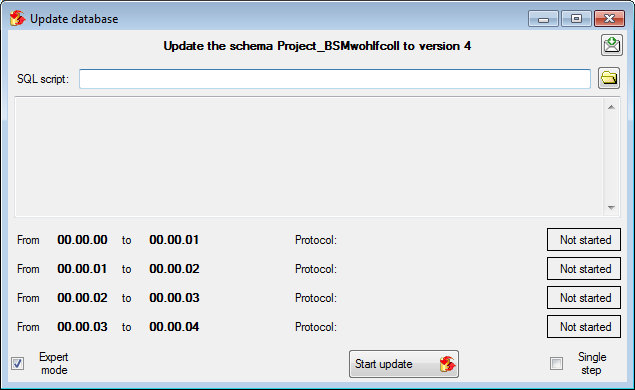
After the update the database is ready to transfer data into.
![]()
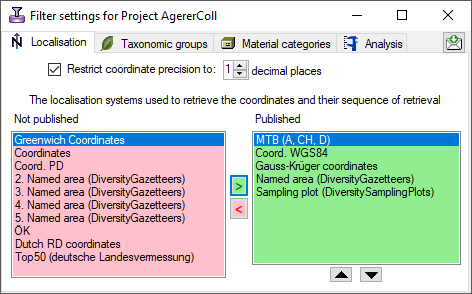
Besides the restrictions in the source database, you can set further
restrictions for this transfer. Click
on the
 button to edit the datawithholding
reasons for the data of the project. Click
on the
button to edit the datawithholding
reasons for the data of the project. Click
on the
 button and choose the ranges of
the data that should be transferred (see below).
button and choose the ranges of
the data that should be transferred (see below).
To transfer the data you have 3 options as described in the Transfer chapter.
Afterwards the number and date of the transferred data are visible as shown below.
![]()
To inspect the transferred data use the View
content
 button. A window as shown below will
open where all tables containing the data of the project are listed.
button. A window as shown below will
open where all tables containing the data of the project are listed.
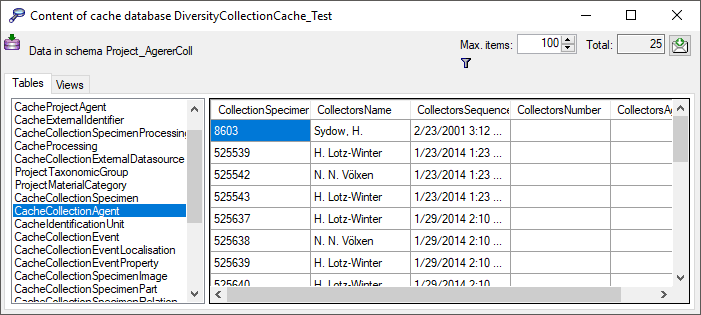
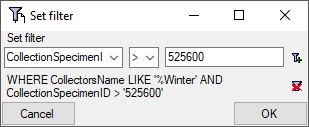
Click on the
 button to filter the content. A window
as shown below will open. Choose the column for the filter, the operator (e.g. =
) and the filter value (see below).
button to filter the content. A window
as shown below will open. Choose the column for the filter, the operator (e.g. =
) and the filter value (see below).

Now click on the
 button to add the filter criteria
to the table filter. You may add as many criteria as needed (see below). With
the
button to add the filter criteria
to the table filter. You may add as many criteria as needed (see below). With
the
![]() button you can clear the filter..
button you can clear the filter..
Before you can transfer the data into the Postgres
database, you have to connect
 to the Postgres database and click on the
 button to establish the project and run necessary updates
. After the project is established and up
to date, use the
button to establish the project and run necessary updates
. After the project is established and up
to date, use the
 button to transfer the data in the Postgres
area (see below).
button to transfer the data in the Postgres
area (see below).
![]()
If a project is exported into another
 Postgres database
on the same server, these databases will be listed underneath the Postgres block
(see image below). For an overview of all target Postgres databases click on the
Postgres database
on the same server, these databases will be listed underneath the Postgres block
(see image below). For an overview of all target Postgres databases click on the
 button.

If the target is placed on the current server, the text will appear in black (see image below). Packages will be listed for the other targets as well.

In the
Postgres database
you can install packages
 to adapt the data to any needed format.