
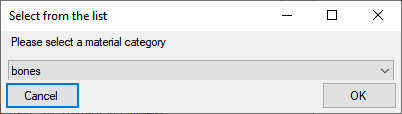
To enter the data
connected with the
storage of the specimen click on the
 below the specimen tree. A window
will appear where you have to select the material category
of the part you want to insert (see below). In
the list select "herbarium sheets".
below the specimen tree. A window
will appear where you have to select the material category
of the part you want to insert (see below). In
the list select "herbarium sheets".
Another dialog will appear where you are required to enter the collection where your specimens are stored (see below).

Select the collection from the list or the hierarchy and click OK to close the dialog. The bottom tree will now contain the selected material with all organisms (see below).
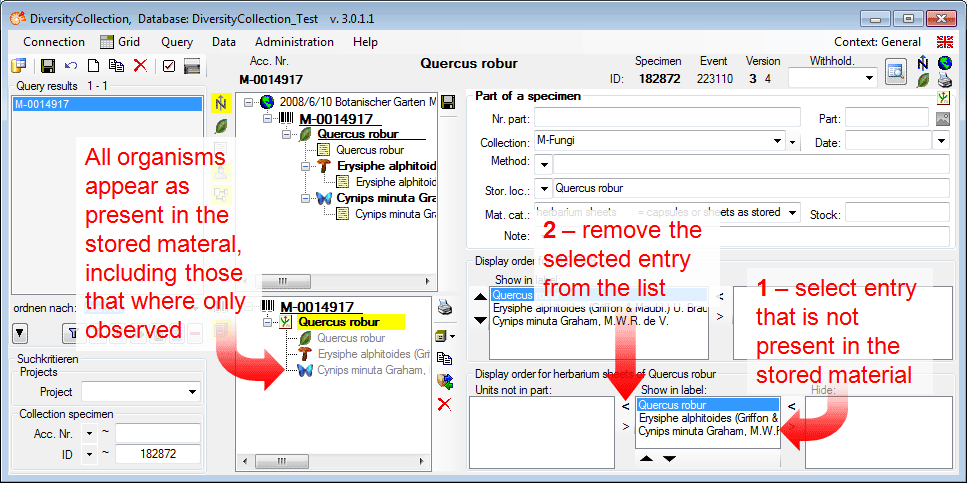
Let's assume that the insect is not present in the specimen, but e.g. has only been observed during the collection of the sample. To document this remove the entry for the insect from the Show in label list to the Units not in part list: Select it (see point 1 in image above) and remove it (see point 2 in image above) (click on the < button). The result is shown below.

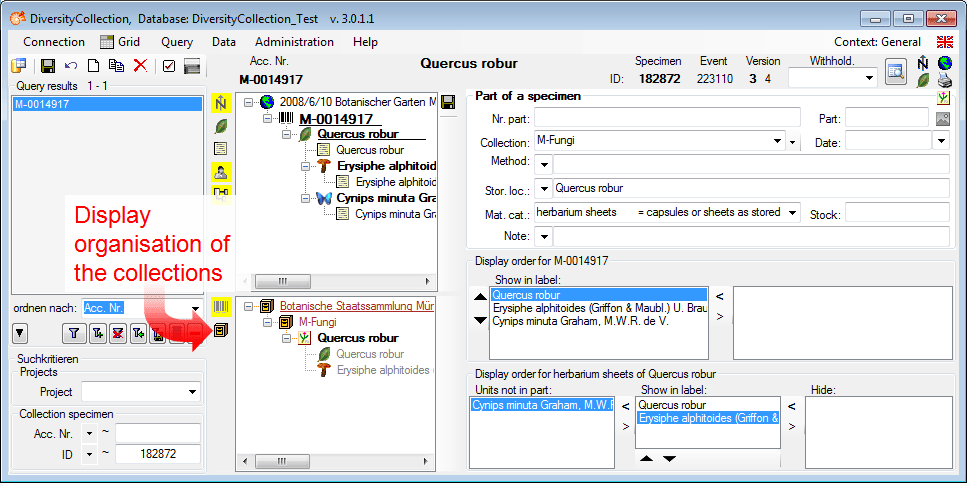
To see the exact position within
the collection
click on the  button at the
left side of the
tree. The tree will change as shown below where all the
collections and
subcollections together with the parts of the specimen are
listed (see below).
button at the
left side of the
tree. The tree will change as shown below where all the
collections and
subcollections together with the parts of the specimen are
listed (see below).
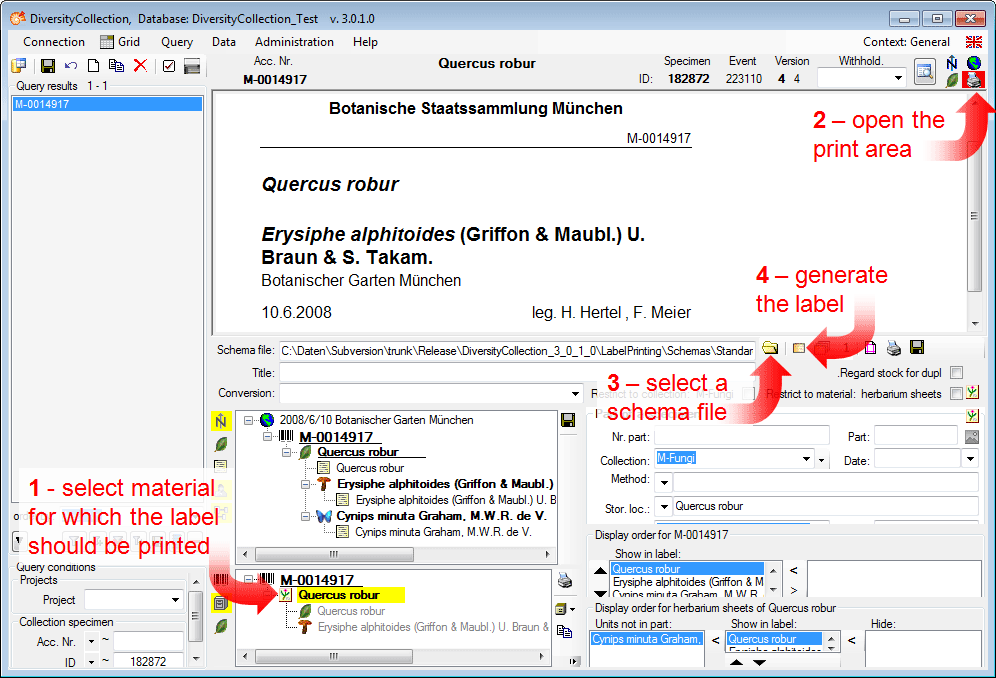
To print a label for a stored part
of the specimen
select it in the tree (see point
1 in image below) and click on the
 button in the upper right corner to open the area for the
label (see point
2 in image below).
Click on the
button in the upper right corner to open the area for the
label (see point
2 in image below).
Click on the  button (see point
3 in image below) to select a Schema file (e.g.
Standard.xslt). Then click on the
button (see point
3 in image below) to select a Schema file (e.g.
Standard.xslt). Then click on the
 button to generate a label (see point
4 in image below).
button to generate a label (see point
4 in image below).
Turn to the Section part for more details.
This tutorial is continued in the sections listed below.