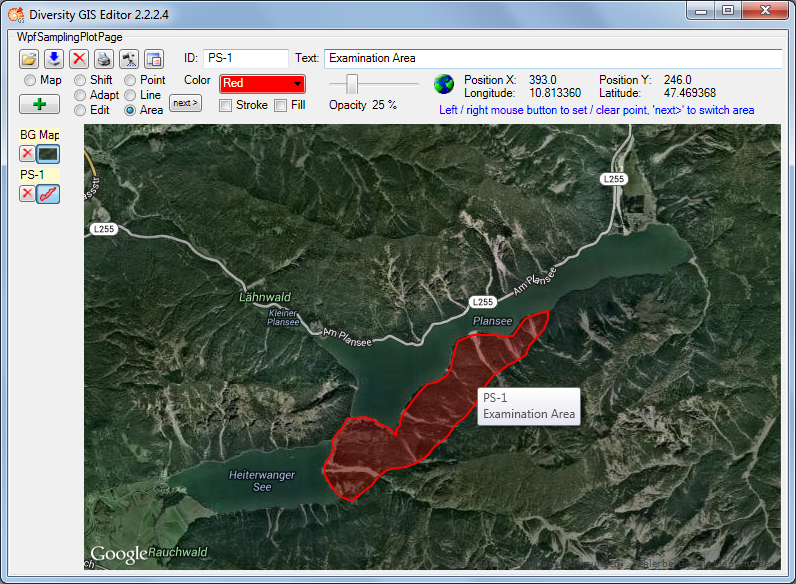
This mode is used to create areas (polygons) on the background map. The cursor changes to a cross line when touching the background map. Each click on the left mouse button sets a new point of the polygon. Every click on the right mouse button clears the last point set. The closed polygon defined by the points is displayed completely at any time. When holding the left mouse button the point can be placed while the lines of the polygon are shown as a "rubber band" display.
To create more than one area for a sample, just click the
 button. This will finish the current polygon and start another one. It could be
repeated without limitation of the number of polygons.
button. This will finish the current polygon and start another one. It could be
repeated without limitation of the number of polygons.
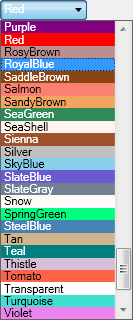
The areas are created as filled polygons, this means they have a border line (stroke) and a filling. The color of stroke and filling can be set independently or simultaneously by clicking the appropriate check boxes beneath the Color list box. Clicking on the list box will open a drop down menu with the complete set of 141 predefined brushes. Use the scroll bar to navigate to the preferred color and select it with the left mouse button.
Besides the color the transparency of the area could also be set for stroke and filling. In each edit mode the slider control is used for that. The area stroke or filling changes smoothly from invisible at the left till completely opaque on the right slider position. The value beneath the slider control indicates the opaqueness in a range from 0% to 100%. The default settings are 100% for stroke and 25% for filling.
Before adding the polygon to the Sample List an Identifier (ID) and a Description (Text) should be written to the text boxes in the control panel.
Clicking the Add button
will put the current area(s) as one sample into the Sample List. The toggle button
will show a small picture of the first area of the sample. The ID will be displayed
above the button. Furthermore a tool tip will be created for the sample holding
the ID and Description, which will pop up when moving the mouse over the toggle
button or over the polygon in the working area.